It’s no secret that babies love to play with the tags on blankets and stuffed toys. Something about the texture of the tag that is silky and soft… I hear it’s a comfort thing. These blankets are soft and have ribbons sewn into the perimeter.
When purchasing a name brand blanket, these security blankets can cost upwards of $25. Yikes! You can easily replicate this playful, cuddly number for around $10 and give a young child a comforting, much loved security blanket.
Items needed
1/2 yard soft fabric (fleece, flannel, etc)
Variety of ribbons in different widths, colors and textures (grosgrain, satin, etc)
Scissors
Measuring tape
Sewing machine or needle with thread
1. Fold your fabric into a triangle to make a square (approximately 18”) and cut. I chose to use different fabric for the front and the back but you can easily use the same fabric.

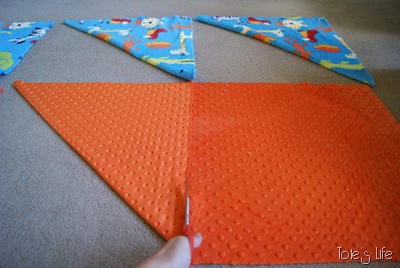
2. Lay your fabrics together. If there is and “inside” to the fabric, make sure these oppose each other (i.e. have the right-side-out of the fabric face the inside).

3. Keep foster kittens from messing with your ribbon (if applicable).

4. Pin your fabric together.

5. Lay your ribbon out around your blanket (not necessary, but it helps when visualizing the finished product.

6. Cut 16-20 pieces of ribbon, 5-6” long each.

7. Lay your ribbon around the blanket (again, for visualization purposes).
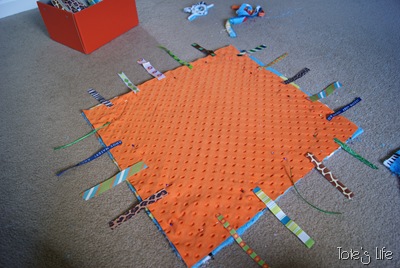
8. Fold your ribbon in half right-side-out, and pin between the two layers of fabric with the cut ends facing out and lining up with the perimeter of the fabric.


9. Once you have all the ribbons secured, sew a 1/2” seam allowance around the perimeter of the blanket, leaving a 3” hole to turn the blanket inside out.
10. Turn the blanket inside out, tuck in the edges of the hole and hand stitch the opening closed.




 My parents have some of these beauties on their tree that I believe were made by my great grandma. She used the satin covered balls and didn’t have to worry about covering the entire ornament since the satin looks nice, but I only had styrofoam balls handy, so I had to make do. I painted my first ornament before getting started in case any of the styrofoam showed through, but quickly realized that wouldn’t be a problem so I didn’t bother painting any of the others.


 I wanted to do something special for Mr. Tote for Christmas this year. When I saw this
  I texted him to say I was working on something special and for him to call me half an hour before he was due home from work. When he called, I was right in the middle of making it!
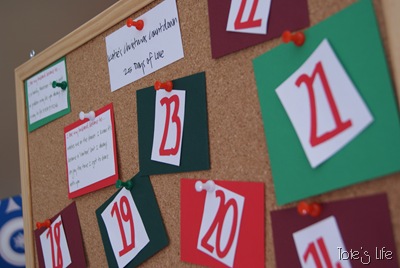 So I told him to find something to do for an hour and then to call me. An hour later he called… the kitchen table was littered with scraps of paper, the Cricut machine, glue and scissors. “Give me 45 more minutes,” I said. He called again, 45 minutes later.
 Blast! Still not done. So I told him to come home but to wait in the garage. So he bought some eggnog and spiced rum and sat in the car in the garage for a good half an hour before I was finally ready to reveal my surprise.
 I love the way this turned out and I think he does, too. Each day, he gets to turn over the appropriate number and find a special note from me, describing one of countless reasons I love him.
 I love the Christmas season! This is going to be so much fun!


