Monday, September 28, 2009

Cheeseburger Cupcakes

This recipe has made its way around the cooking blog world and I am late getting on the train. But these were too damn cute to keep to myself. So bear with me as I show off. Please visit Bakerella's Blog. She has an excellent tutorial, which is paraphrased below, along with cake pops, which I am dying to make.

1 package brownie mix
1 package yellow cake mix
1 container white frosting

Prepare the cake mix, according the directions for cupcakes. One box should make around 24 cupcakes. Be sure to spray the cupcake tray before baking and watch them carefully so they don’t get too brown on the sides. Cool completely and remove from the tray.

Prepare the brownie mix, per the directions. Bake in a 9x13 dish and cool completely.

Time to assemble! Cut each cupcake in half to make two bun circles. Using a small circle cookie cutter, cut out 24 hamburger patties from the tray of brownies and place in between the cupcake bun.

IMPORTANT: Dispose of the scraps appropriately. May I suggest with a tall glass of milk?

For the frosting, divide the container into 3rds in three separate bowls. Use red food coloring for the ketchup (a little purple helps darken it a bit), yellow for the mustard and green for the lettuce. You can also substitute green-dyed coconut for the lettuce.

Place each color in a ziploc bag and snip a small tip off one corner.

Gently squeeze out the mustard and ketchup first. Then the lettuce in more of a squiggly design. Place the top of the bun on and press gently.

Optional: Brush a very thin layer of water over the top of the bun or either dab a few drops of water on with your finger. Sprinkle sesame seeds on top and they’ll stick.


Monday, September 21, 2009

Sangria

Allison, over at Baker’s Broom Closet posted the recipe for her sangria and since I’ve never made it before, I figured I’d give it a try. The best sangria I ever had was at Cha Cha Cha in San Francisco with my friend Anne, but this recipe is a close second!

This sangria packs a real punch, especially the fruit that soaked in tequila, wine and brandy for 24 hours… wowzah!! This stuff tasted so good… so it went down real fast… so my cheeks got all rosy and hot in no time (*wink wink*). I thought this sangria was fabulous and I will definitely be using it for future get togethers.

Here is my recipe, based on Allison's guidelines.

1 apple
1 orange
1 lemon
1 lime
1 mango
Handful of blueberries
1/3 C brandy or triple sec
1 C tequila
1.5 Liter bottle of wine, or 2 regular sized ones.
1 C sugar
Sprite, I used Diet Sparkling Sunkist Lemonade

At least 1 day before serving , cut up all of the fruit and put it in a serving container.

In a pot, boil one cup of water with the cup of sugar, until the sugar completely dissolves. Add the simple syrup to the container. Cover the fruit with the tequila and brandy, followed by the wine. Be sure to leave a couple of inches at the top of the container for adding in the Sprite right before serving.

Stir it a couple of times to mix the sugar, liquor and wine and then let it sit until just before serving. When ready to serve, stir the mixture. Then start adding the Sprite. Start about a cup or so of Sprite and taste. Sangria is best served over ice, so be sure to have a container nearby with some ice in it.


Sunday, September 20, 2009

Mongolian Pork

I have been so excited to try this recent recipe from Elly over at Elly Says Opa. So when I was craving chinese take out, I knew this would be the perfect fix. One problem... no steak lying around. Solution... two pork center cut loin chops!! I did nothing else to modify the recipe, other than the meat.

This dish tasted amazing with brown rice. Mr. Tote commented on how tender the pork was. We will definitely be having this again. I can't wait to try it with some steak.

2 pork chops, sliced thin.
3 Tbsp. corn starch
3 tsp. canola oil, divided
1/2 tsp. grated ginger
2 cloves garlic, minced
1/3 cup low-sodium soy sauce
1/3 cup water
1/4 cup brown sugar
1/4 tsp. red pepper flakes
2-3 large scallions, sliced

Pat the pieces of pork and make sure they’re dry; then, toss the meat and cornstarch together. Be sure all pieces are fully coated, but shake off excess corn starch. Mix together the soy sauce, water, brown sugar and red pepper flakes.

Heat half the oil in a wok at medium-high heat and add the ginger and garlic. Once fragrant (30 seconds or so), add the soy sauce mixture. Cook for about 2 minutes and transfer to a bowl.

Turn the heat up on the wok and add the remaining oil. Add the pork and cook, stirring until just browned. Pour the sauce back in and let it cook with the meat. Let the sauce thicken to your liking, and then add the green onions in just before plating.


Wednesday, September 16, 2009

Inspire Me!

So, if you haven't checked it out yet, blogger Roeshel has an amazing Do It Yourself blog called The DIY Showoff. Folks submits projects they have done and she features them on her site! This is one of my favorite blogs to visit when I need some inspiration.

Right now, Roeshel is hosting a super fun scavenger hunt that winds its way through other project-y, crafty blogs. I am in on the fun to win fabulous prizes!

One of my favorite posts from her site was the More Fabulous Furniture Makeovers feature. This post inspired me to scour garage sales and craigslist for the perfect piece of furniture to give some life to. Now I have two chairs, a large mirror and a piano bench laying around my house, waiting for me to freshen them up. Mr. Tote is less than enthused because now he can't park his car in the garage. On a positive note, I have a dresser completed that I will be blogging about soon, kiddies!

Definitely check out The DIY Showoff if you need some inspiration. Start small, people, and GET CRAFTY!!


Tuesday, September 15, 2009

Our Kitchen: Before and After

Update: Layla over at the Lettered Cottage is hosting a Room Re-Do 2009 party. I'm joining in on the fun!

When we bought our house in March, we said that there was really nothing wrong with the kitchen. Hell, the house was built in 2001. It isn't old enough to have anything wrong with it. BUT... we got the $8,000 tax credit and put it all back into our house, including our bathroom.

BEFORE...

Front hallway. Main entrance to our house is at the end on the left. The doors on the left house the washer and dryer.
Main part of kitchen, for kitchen table...
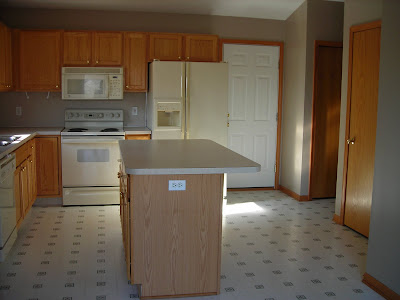
The door in the back of this picture goes to the garage. The kitchen island is in the middle.
DURING...

Here's all the wood laid out in our living room. I picked out 3 1/4" 50-year rustic maple from Lumber Liquidators. For around 350 sq. ft., we paid around $1,700, including the transition strips.
My wonderful husband, Matt, working hard...
Our friend Brandon working hard...
Matt's best friend, Josh, hardly working (just kidding, Josh!!)...
We laid a six-tile area in front of the garage door, advised by the folks over at Lumber Liquidators, as it is our main entrance. This avoids the salt and dirt from our shoes getting on the hardwood floor.

AFTER...

New light fixtures in the entryway and kitchen...
The tile entryway from the garage door...


We replaced all of the hardware in the kitchen. Goodbye brass, hello oil rubbed bronze! Can you just picture some gorgeous granite or staron countertops? Something flecked with browns, tans, black and silvers. Someday...
I LOVE MY KITCHEN!! The counterspace, the wood floors, the colors. Now, for some decorating! I am seeking a starving college student painter who can paint me a three panel painting on stretched canvas to fill my big yellow wall. I am thinking wispy dandelions in a field in shades of gray. Something like this (notice that there are three panels that make up the one large image). I have decided that our kitchen colors are dark espresso, the mustardy (but not mustard) yellow, silver and shades of gray. The nice thing is that I'm not impatient and I will wait for the perfect pieces for the kitchen. So there you have it!


Monday, September 14, 2009

Tequila Lime Shrimp

The crew over at Hungry Girl is always cooking up something delicious that is low in calories and fat. BONUS! When I saw this recipe for Tequila Lime Shrimp, I just had to try it. I probably overcooked the veggies a bit, plus my yellow pear tomatoes were a bit ripe so they were extra soft to begin with. But the flavor was A-MAZ-ING!

8 oz. raw shrimp, peeled, deveined, tails removed
2 Roma tomatoes, chopped
1 small onion, sliced
3 tbsp. (1 1/2 oz. or 1 shot) tequila
2 tbsp. lime juice
2 tbsp. coarsely chopped fresh cilantro
1 tsp. minced garlic
1/4 tsp. chili powder
1/4 tsp. salt

Bring a large pan sprayed with nonstick spray to medium heat. Add onion and garlic, and cook until onion is slightly translucent, about 3 minutes. Carefully add tequila to the pan and stir. Cover the pan and let simmer for 5 minutes.

Add shrimp and cook for about 3 minutes, until shrimp are nearly opaque. Add tomatoes, lime juice, cilantro, chili powder, and salt, and mix well. Stirring occasionally, cook until tomatoes have softened and shrimp are cooked through, about 2 minutes.

WW Points per Serving: 4 Points


Sunday, September 13, 2009

Mom's Potato Salad

(sorry for the blurry pic, guys)

My mom makes THE BEST potato salad, in my opinion. She made it for our housewarming party in July and it was a huge hit, as usual. When I asked her for the recipe, her reply was “What recipe? I don’t use a recipe!” But she managed to give some basic guidelines for her potato salad, which follows.

This serves about 4 people. ..

Boil 4-6 large red-skin potatoes. When done, douse with cold water. This will loosen the skins. Refrigerate until cool or cold. Peel and Cut into chunks.

Add:
1 chopped hard boiled egg.
1-2 stalks chopped celery
1 tsp. dill or sweet relish (your preference)
1/4 - 1/2 c. chopped onion

Mix well.

Add:
Season salt and Mrs. Dash original table blend to taste
1 tsp. mustard
1/2 c. Miracle Whip light
Mix well and refrigerate until well chilled.


Saturday, September 12, 2009

Low-Fat Zucchini Bread

I love zucchini and summer squash in all of its forms. Sauteed, grilled, stir fried, etc, etc. I especially love it in zucchini bread. So I was thrilled when I found this recipe from recipezaar.com. I made some modifications, based on the recipe reviews. This bread turned out excellent with lots of flavor and lots of moisture. My modified recipe is below.

1 ½ C sugar
¾ C egg beaters (or equivalent of 3 eggs)
3 C flour
2 C shredded zucchini
1 C shredded carrots
¼ C vegetable oil
¾ C no sugar added applesauce
1 tsp baking soda
¼ tsp salt
¼ tsp baking powder
1 Tbsp cinnamon
½ tsp allspice
1 tsp nutmeg
1 ½ Tbsp vanilla
1 C chopped walnuts

Preheat oven to 350 degrees. Combine all ingredients in a large bowl. Grease 2-3 loaf pans, depending on the size of your pans. I used my Pampered Chef stone loaf pan and a 6” disposable loaf pan. It’s important not to overfill the pans. I filled mine about 2/3 of the way full. Bake for 45-60 minutes, or until a toothpick comes out clean.

Cool on a baking rack.


Friday, September 11, 2009

I'm Playing the DIY Show Off Scavenger Hunt


Roeshel over at The DIY Show Off is hosting a super fun scavenger hunt! I am having a great time looking for the clues and visiting other blogs! Click the pic above to check it out and get in on the FUN!


Monday, September 7, 2009

Cheeseburger in Caseville Family

Last of these posts, but I can't leave out the whole reason for going to Cheeseburger in Caseville, to get together with my mom's side of the family.

Here's the adults. Left to right are my grandma, mom, Aunt Robin (in the back), Aunt Sharon, Uncle Steve, me and Matt...

Little Miss Rowyn, enjoying her elephant ear...
Kynson, also enjoying his elephant ear... Cousins Devyn, Kynson and Rowyn...
I like this one of my mom and I...

Matt and I with our good friends, Don Middlebrook and Laurie...
Around the house, my grandparents' house, that is...


My cousin Tommy splitting wood for a fire later that night
Smashing, isn't he?
Can you tell that Rowyn LOOOOVVEEESSS Ozzy?
Sleepy doggies...