Monday, December 28, 2009

Two Easy Christmas Decorations

Christmas may be over, but I'm still full of posts all about my favorite holiday! And with Roeshel's final DIY Holiday Highlights party, I figured this would be a perfect post to join the party! Below are two of the easiest, inexpensive Christmas decorations I came up with this year, the first Christmas in our new house.

Trifle bowl, I’d like you to meet Ornament. Now, make friends and sit real pretty on my TV stand. K, thanks.

This garland cost me all of $2 to make and I had enough for my kitchen AND guest bathroom. Using a 9 foot roll of wired ribbon, a pack of six snowflakes from the dollar store and some mini suction cups I had on hand, I created this puppy in less than 10 minutes.


Of course, I'm linking to Roeshel's DIY Show Off Holiday Highlights Party.

The DIY Show Off

I'm also linking to:


Making


Test Post - Help!


Bear with me. I am testing out creating my posts in MS word, as opposed to uploading pics and messing around with the screwy Blogger editor formatting. What do you use to create your posts? This all started while I was scoping out Centsational Girl's tutorial on fixing photos.


Sunday, December 27, 2009

Baby Jesus is in Da House!

One of my favorite family traditions growing up was running down the stairs on Christmas morning to see Baby Jesus in the manger. It only made sense that he was missing from the nativity scene in the weeks leading up to Christmas because he wasn’t born yet. Duh! My parents always snuck him in sometime after we went to bed on Christmas Eve, when they put out the presents.

So, before I went to bed a few nights ago on Christmas Eve, I pulled Baby Jesus out of the cabinet in the TV stand and set him in the manger. It’s little things like that, that remind me of the true reason for the season.


Saturday, December 26, 2009

Apps and Wine Party Wrap Up


The weekend before Christmas, we hosted an Appetizers and Wine party. It all stemmed after Mr. Tote and I attended a client appreciation event where they served us shrimp cocktail shooters in shot glasses. Now, I've seen this done many times before, but I had put the idea in the back of my mind. Seeing these beauties at the party reminded me that I never did make those darn things. Hence, the reason for the holiday get together. So we had 11 of our friends over, along with three children under the age of 2. We asked everyone to bring a bottle of wine, while we supplied the food goodies. Below is the menu we served...

Roast Beef and Sharp Cheddar Sandwiches
Ham and Aged White Cheddar Sandwiches
Stone Ground Honey Mustard - recipe follows
Creamy Horseradish - recipe follows
Shrimp Cocktail Shooters with a salt and pepper rim - recipe follows
Pesto Pinwheels from Ellie at Vintage Victuals
Buffalo Chicken Dip, aka Chicken Shit
Baked brie with walnuts and apricot preserves inspired from Vintage Victuals
Veggie tray with ranch dip

For desserts we had:
Eggnog Thumbprint Cookies from Shelby at The Life and Loves of Grumpy's Honeybunch
Hershey Pretzel Bites
I added some fun DIY touches to our "counterscape." To avoid having to use regular old plates for serving, I grabbed a few spare tiles and used other items around the house to raise them up. This worked great for the shrimp cocktail shooters because I hid a big bowl of ice in the shadow box frame to keep the shrimp cold.

I also picked up some holiday colored paint swatches from Lowe's and used a white pen to put signs up for all of the food. This really came in handy for when folks were wondering what the heck was wrapped up in dough (the brie with walnuts and apricot preserves).
Mr. Tote was so helpful!
The sandwich platter took a reeeaaaallllly long time to make. I purchased rolls that had to be baked and sliced in half. Then I had to slice the cheese thinly off the blocks I bought. It was really time consuming, but they turned out so cute.
With the sandwiches, I served some stone ground honey mustard and creamy horseradish.

Stone Ground Honey Mustard
1/2 C stone ground mustard
2 Tbsp honey

In a small bowl, microwave the honey for 20-30 seconds, or until thin. Mix in the mustard with a fork until fully incorporated. Refrigerate until serving.

Creamy Horseradish
1/3 C mayonnaise
1/3 C sour cream
1/3 C horseradish

Mix all ingredients together in a small bowl and refrigerate until serving.

As I mentioned earlier, the inspiration for this party came from some cocktail shrimp shooters I had at a client appreciation party. Their shrimp were served in a tall glass shotglass with WAAAAAY too much cocktail sauce for one little shrimpy. So I headed to Party City to pick up some 1.5 oz. clear plastic shot glasses.

I wet the rims of the cups with a sponge and dipped them into a mixture coarse kosher salt and fresh ground black pepper in a shallow dish. Now I know how bartenders feel when they have to rim margarita and daquiri glasses with sugar or salt.

I made the cocktail sauce with about a cup of ketchup, a third of a cup of horseradish and a tablespoon of lemon juice.

Here are some additional pictures of the food.
The rocky road fuuuuuuuuuuuudge...


I hope you all had a wonderful holiday. I feel so blessed that I was able to spend lots of time with my family and friends.


Tuesday, December 22, 2009

Manchego Foccacia


It's not a secret that I love cheese. So it's not uncommon to find me perusing the cheese cooler at our local market. I swear I come home with at least one block of cheese each time I go there, regardless of what my original reason for going there was. So, this beautiful block of Manchego has been sitting in my fridge for a week or so. I was looking for an EASY bread to make with my cheese and came across this recipe from Tyler Florence for his "Fabulous Focaccia." Any recipe that has the word 'fabulous' in its title is worth a shot.

I must say, in one word, this foccacia was FABOOSH (a la Perez Hilton). So easy, so yummy. The manchego crisped up on top and provided a sharpness that paired so well with some Chicken Sausage, Kale and White Bean Soup. I'd love to make this again with something like aged white cheddar. I'd also like to try Tyler's recipe as is, which included a topping of caramelized onions, rosemary and parmesan.

2 teaspoons rapid-rising dry yeast
1 cup warm water
2 tablespoons sugar
3 1/2 to 4 cups flour
1 tablespoon coarse salt
1/4 cup olive oil
Cornmeal, for dusting
1 C Manchego cheese
2 Tbsp dried oregano

In the bowl of a standing mixer fitted with a dough hook, proof the yeast by combining it with the warm water and sugar. Stir gently to dissolve. Let stand 3 minutes until foam appears. Turn mixer on low and slowly add the flour to the bowl. Dissolve salt in 2 tablespoons of water and add it to the mixture. Pour in 1/4 cup olive oil.

When the dough starts to come together, increase the speed to medium. Stop the machine periodically to scrape the dough off the hook. Mix until the dough is smooth and elastic, about 10 minutes, adding flour as necessary.

Turn the dough out onto a work surface and fold over itself a few times. Form the dough into a round and place in an oiled bowl, turn to coat the entire ball with oil so it doesn't form a skin. Cover with plastic wrap or damp towel and let rise over a gas pilot light on the stovetop or other warm place until doubled in size, about 45 minutes.

Coat a sheet pan with a little olive oil and corn meal. Once the dough is doubled and domed, turn it out onto the counter. Roll and stretch the dough out to an oblong shape about 1/2-inch thick. Lay the flattened dough on the pan and cover with plastic wrap. Let rest for 15 minutes.

Preheat oven to 400 degrees F. Uncover the dough and dimple with your fingertips. Brush the surface with more olive oil and then add the manchego cheese. Sprinkle with the oregano and bake on the bottom rack for 15 to 20 minutes.


Monday, December 21, 2009

Nephew's "First Birthday" Present

Our #1 (and only) nephew turned one year old on December 10. For his birthday present we kidnapped, I mean... babysat, him one Sunday afternoon. After Mr. Tote took a good 15 minutes figuring out how to put the car seat in properly, we were off to my favorite pottery studio, Art Unlimited. There, we made the plate you see above, using little Calvin's hands and foot to form a reindeer. Mr. Tote painted all of the writing while I did the outside border, using a reverse stenciling technique and some "snowfall" paint that puffs and bubbles when fired.

Calvin screamed his way through the painting and pressing of his hands and foot, but was otherwise a very happy baby and even took his turn painting the back of the plate.


His mommy and daddy loved the plate. I was especially proud that I didn't spill the beans before his birthday party. I was just so excited to give it to them!! Here he is at his party, enjoying his Elmo cupcake. Such a ham, he is!


Saturday, December 19, 2009

Chocolate Hazelnut Biscotti

While biscotti is quite a process to produce, I assure you... the results are sooo worth it! This treat has been going perfectly with a cup of coffee in the morning!

I found this recipe on the Joy of Baking website, originally from the Williams-Sonoma Kitchen Library Series - Cookies & Biscotti.

4 ounces semisweet or bittersweet chocolate, coarsely chopped
1 cup firmly packed light brown sugar
1 3/4 cups all-purpose flour
1/3 cup unsweetened cocoa, preferably Dutch-processed
1 tablespoon instant espresso powder
1 teaspoon baking soda
1/4 teaspoon salt
3 large eggs
1 1/2 teaspoons pure vanilla extract
1 cup hazelnuts (toasted and coarsely chopped)

Preheat oven to 350 degrees. To toast the hazelnuts: spread on a baking sheet and bake for 15 minutes or until lightly browned and the skins begin to flake. Remove from the oven and place nuts in a dish towel. Roll up the towel and let the nuts 'steam' for 5 minutes and then briskly rub the towel (with nuts inside) to remove the skins from the nuts. Cool and then chop coarsely. Set aside while you prepare the dough.

Reduce temperature of oven to 300 degree F. Line a large baking sheet with parchment paper.In a food processor fitted with a metal blade, combine the coarsely chopped chocolate and brown sugar and process until the chocolate is very fine; set aside.

Sift or whisk together the flour, cocoa, espresso powder, baking soda and salt into a bowl; set aside. In a large bowl, combine the eggs and vanilla extract and beat to blend, about 30 seconds. On low speed mix in the chocolate/sugar and flour mixtures until a stiff dough forms, adding the hazelnuts about half way through mixing.

On a floured surface divide the dough in half. Form each half into a log 12 inches long. Do this by rolling the dough back and forth into a cylinder shape with floured hands. Transfer the logs to the baking sheet, spacing them well apart (width-wise on the pan), and pat to even the shapes. Bake until almost firm to the touch, about 35 - 40 minutes (logs will spread during baking). Remove from the oven, place on wire rack, and let cool for 10 minutes. Using a long spatula transfer the logs to a cutting board.

Using a serrated knife cut the dough into slices 3/4 inch thick on the diagonal. Arrange the slices cut-side down on the baking sheet. Bake 15 minutes. Turn the slices over and bake until crisp and dry, about 15 minutes longer. Remove from oven and let cool on wire rack.

To make the white chocolate drizzle, microwave about a half cup of white chocolate morsels with just a PINCH of vegetable oil. The oil helps to thin the chocolate, making it easier to drizzle. Microwave for 30 seconds at a time until melted. Drizzle over the biscotti.


Monday, December 14, 2009

Roasted Cauliflower with Hazelnut Oil

Despite all the hype that surrounds roasted cauliflower, I've never attempted to make it. THIS WILL CHANGE STARTING TODAY!!! Oh my gosh, this stuff is soooo good. It's like candy!! I've roasted many veggies before and will now add cauliflower to my repertoire. The nuttiness from the hazelnut oil really adds depth to this dish. I can't WAIT to make this crack, I mean...healthy side dish, again.

10 C raw cauliflower (or about 1 1/2-2 heads)
3 Tbsp toasted hazelnut oil
3 cloves garlic, crushed
1 Tbsp salt, or to taste

Pre-heat oven to 450 degrees.

Roughly chop the cauliflower. Toss in a large bowl with the oil, garlic and salt. Spread out on a very large baking sheet.

Bake for 30-40 minutes on the middle rack, turning over occasionally. Serve hot.

I also think this dish would be awesome with truffle oil. But at $10/bottle for just a few ounces, I'm not sure I could part with that much of one of favorite ingredients in one dish! The toasted hazelnut oil was a gift from a friend whose husband is a chef at a resort and ordered it at wholesale price. :-)

WW Points per Serving: 1 pt per cup!


Thursday, December 10, 2009

Spritz!


I remember my mom making these with her cookie press when we were little and I love that I can still make these in my own kitchen. I love using my Goodwill-find, unused Wilton Cookie Press for $2 (score!!) and a photocopied page from Betty Crocker's 1963 Cooky Book. See, my mother won't give me her Cooky Book, just make copies of the pages I need for any given project (*ack! Christmas gift! cegchhhhh ack!*).
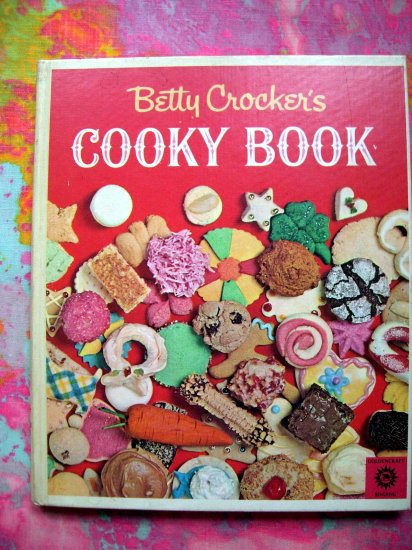
This was the first time I used my new Wilton cookie press and I absolutely love it! Unlike my mom's, this one is just like a caulk gun and dispenses the perfect amount of dough with each squeeze. My mom's press may be metal as opposed to my plastic version, but it also requires a precise quarter to one half turn per cookie to dispense the dough. I had issues getting approximately the same amount of dough to dispense for each cookie using her press, so (no offense, mom) I am glad I have one that is friendly for the baking-challenged.

I will now transcribe what Ms. Betty Crocker herself describes as "How to Make Perfect Pressed Cookies."

Mix dough as directed - doughs for pressed cookies are high in shortening. Dough must be pliable. If very warm, chill for a short time. (If too cold, it crumbles.) Using 1/4 at a time, place dough in cooky press. Force dough through cooky press, following manufacturers' directions, on ungreased baking sheet. If baking sheet is too warm, fat in the dough will melt and cookies will pull away from sheet when press is lifted. Bake until set. Perfect pressed cookies have:
  • well-defined pattern and shape
  • tender, yet crisp eating quality
  • rich, buttery flavor

1 C butter or margarine
1/2 C sugar
1 egg
1/2 tsp salt
1 tsp flavoring (almond or vanilla)
2 1/4 C flour

Preheat oven to 400 degrees.

Mix butter, sugar, egg, salt and flavoring thoroughly.

Work in flour. Using small amounts of dough at a time, force through the cooky press onto an ungreased baking sheet in desired shapes.

Bake 6-9 minutes, or until set but not brown.

I'm linking to The DIY Showoff's Show & Tell Holiday Food Edition.


Wednesday, December 9, 2009

Shortbread

NEWS FLASH! These little morsels are so small they contain absolutely no fat or calories!! Thrilling to know, isn't it?? I kid, I kid. However, I do feel that shortbread *can* be eaten in moderation while still savoring it's flaky, buttery goodness.

1 C butter, room temperature (2 sticks, folks)
2 1/2 C flour
3/4 C powdered sugar
1/4 tsp salt

Preheat oven to 325 degrees.

In a large bowl, combine all of the ingredients using a stand or hand mixer. The dough will be crumbly.

Pour the dough into an ungreased 9x9" baking dish. Pat down the dough, working it into the corners of the dish. Pierce the dough many times with a fork before baking for 30-35 minutes.

Cut the dough into pieces while still warm. Otherwise, it flakes apart and breaks if you try to cut it when it's fully cooled.


Monday, December 7, 2009

No-Sew Santa Table Runner

I saw this fun table runner at Hobby Lobby. Not wanting to pay the full price tag, I figured I could easily make a similar runner myself.

Materials needed:

1 ft. of 72" long red felt
5 yards 1" white fur
2 ft black velvet ribbon
2 squares gold fabric - I scoured JoAnn's home fabrics and "borrowed" two of their sample pieces of fabric

Folding your 72" red felt in half, cut a "V" shape in the fabric. Using tacky glue, adhere the strips of black velvet ribbon to the v-shaped ends. Using the gold squares folded in half, cut out a square square with a smaller square to make Santa's belt buckle. Adhere with tacky glue.Run your 1"fur down the length of the runner using tacky glue to adhere it to the felt.


And there you have it, dear readers...
A finished Santa table runner! Super easy. With my 40% off JoAnn's coupon, this project cost around $8 to make. So cute!

And now, some cute pet pics. Here's Ozzy, with his "bite me" t-shirt from Target that cost me a whopping $2.50. These two are best friends...Ozzy, trying to kiss his best friend, Athena. She looks like she's about to b*tch slap him, hahaha!!

I'm linking to The DIY Show Off's Holiday Highlights Party.


Tuesday, December 1, 2009

Homemade Spaghetti Sauce


First, let me say thank you to my brother in law. Without Calvin, I wouldn't have pounds upon pounds of venison to use in my cooking. Sausage, brats, ground venison, steaks. You name it. He shares it. So, thanks Cal! Keep it coming!

I like my spaghetti sauce light on the meat and FULL of veggies. I threw this recipe together using Joelen’s recipe for guidance.

1 lb venison sausage
4-5 lbs brandywine tomatoes (6-8 large ones)
1 zucchini
8 oz. mushrooms
1 large onion
4 cloves garlic
1 red bell pepper
1 C packed fresh basil
1 C fresh packed spinach
1 Tbsp dried Italian herbs

Brown the sausage and set aside, draining any excess liquid.

Bring a large pot of water to boil, but only fill the pot half way full. Blanch the tomatoes, two at a time, by cutting an “X” in the bottom of the tomatoes and then cooking them in the boiling water for 15-30 seconds. Set them aside to cool on a cutting board. When cool enough to the touch, peel the skin from the tomatoes and discard.

Quarter the tomatoes and place them in batches into a blender. Puree until most of the chunks are broken up. Feel free to leave it chunkier or less chunky, depending on your preference.

In a sautee pan, add a little olive oil and sautee the onions and garlic together. Ready your sauce pot(s). I needed two because this sauce produced over 10 cups of finished product.

To the pureed tomatoes, add the venison sausage and sautéed garlic and onions. Chop up the bell pepper, zucchini and mushrooms. Finely slice the basil. Add all of these, plus the spinach and dried herbs to the pot.

Simmer for at least three hours or until the sauce reduces and thickens.

Serve however you’d like! I froze this in two heaping ladle increments, which produced 6 freezer bags worth of sauce.